

Automating Solicitations with MailChimp®
To start automating criminal defense marketing to prospective clients in your county, you first need to connect your MailChimp account to your Client Connect Dashboard. You can do so by selecting the “Automation tab” on your dashboard. If you don’t have a MailChimp account already, you can create one here for free.
Once you’ve provided us with your API key, you’ll be ready to setup an automation that will automatically email recent arrestees an email of your design. This guide will discuss how to setup that automation.
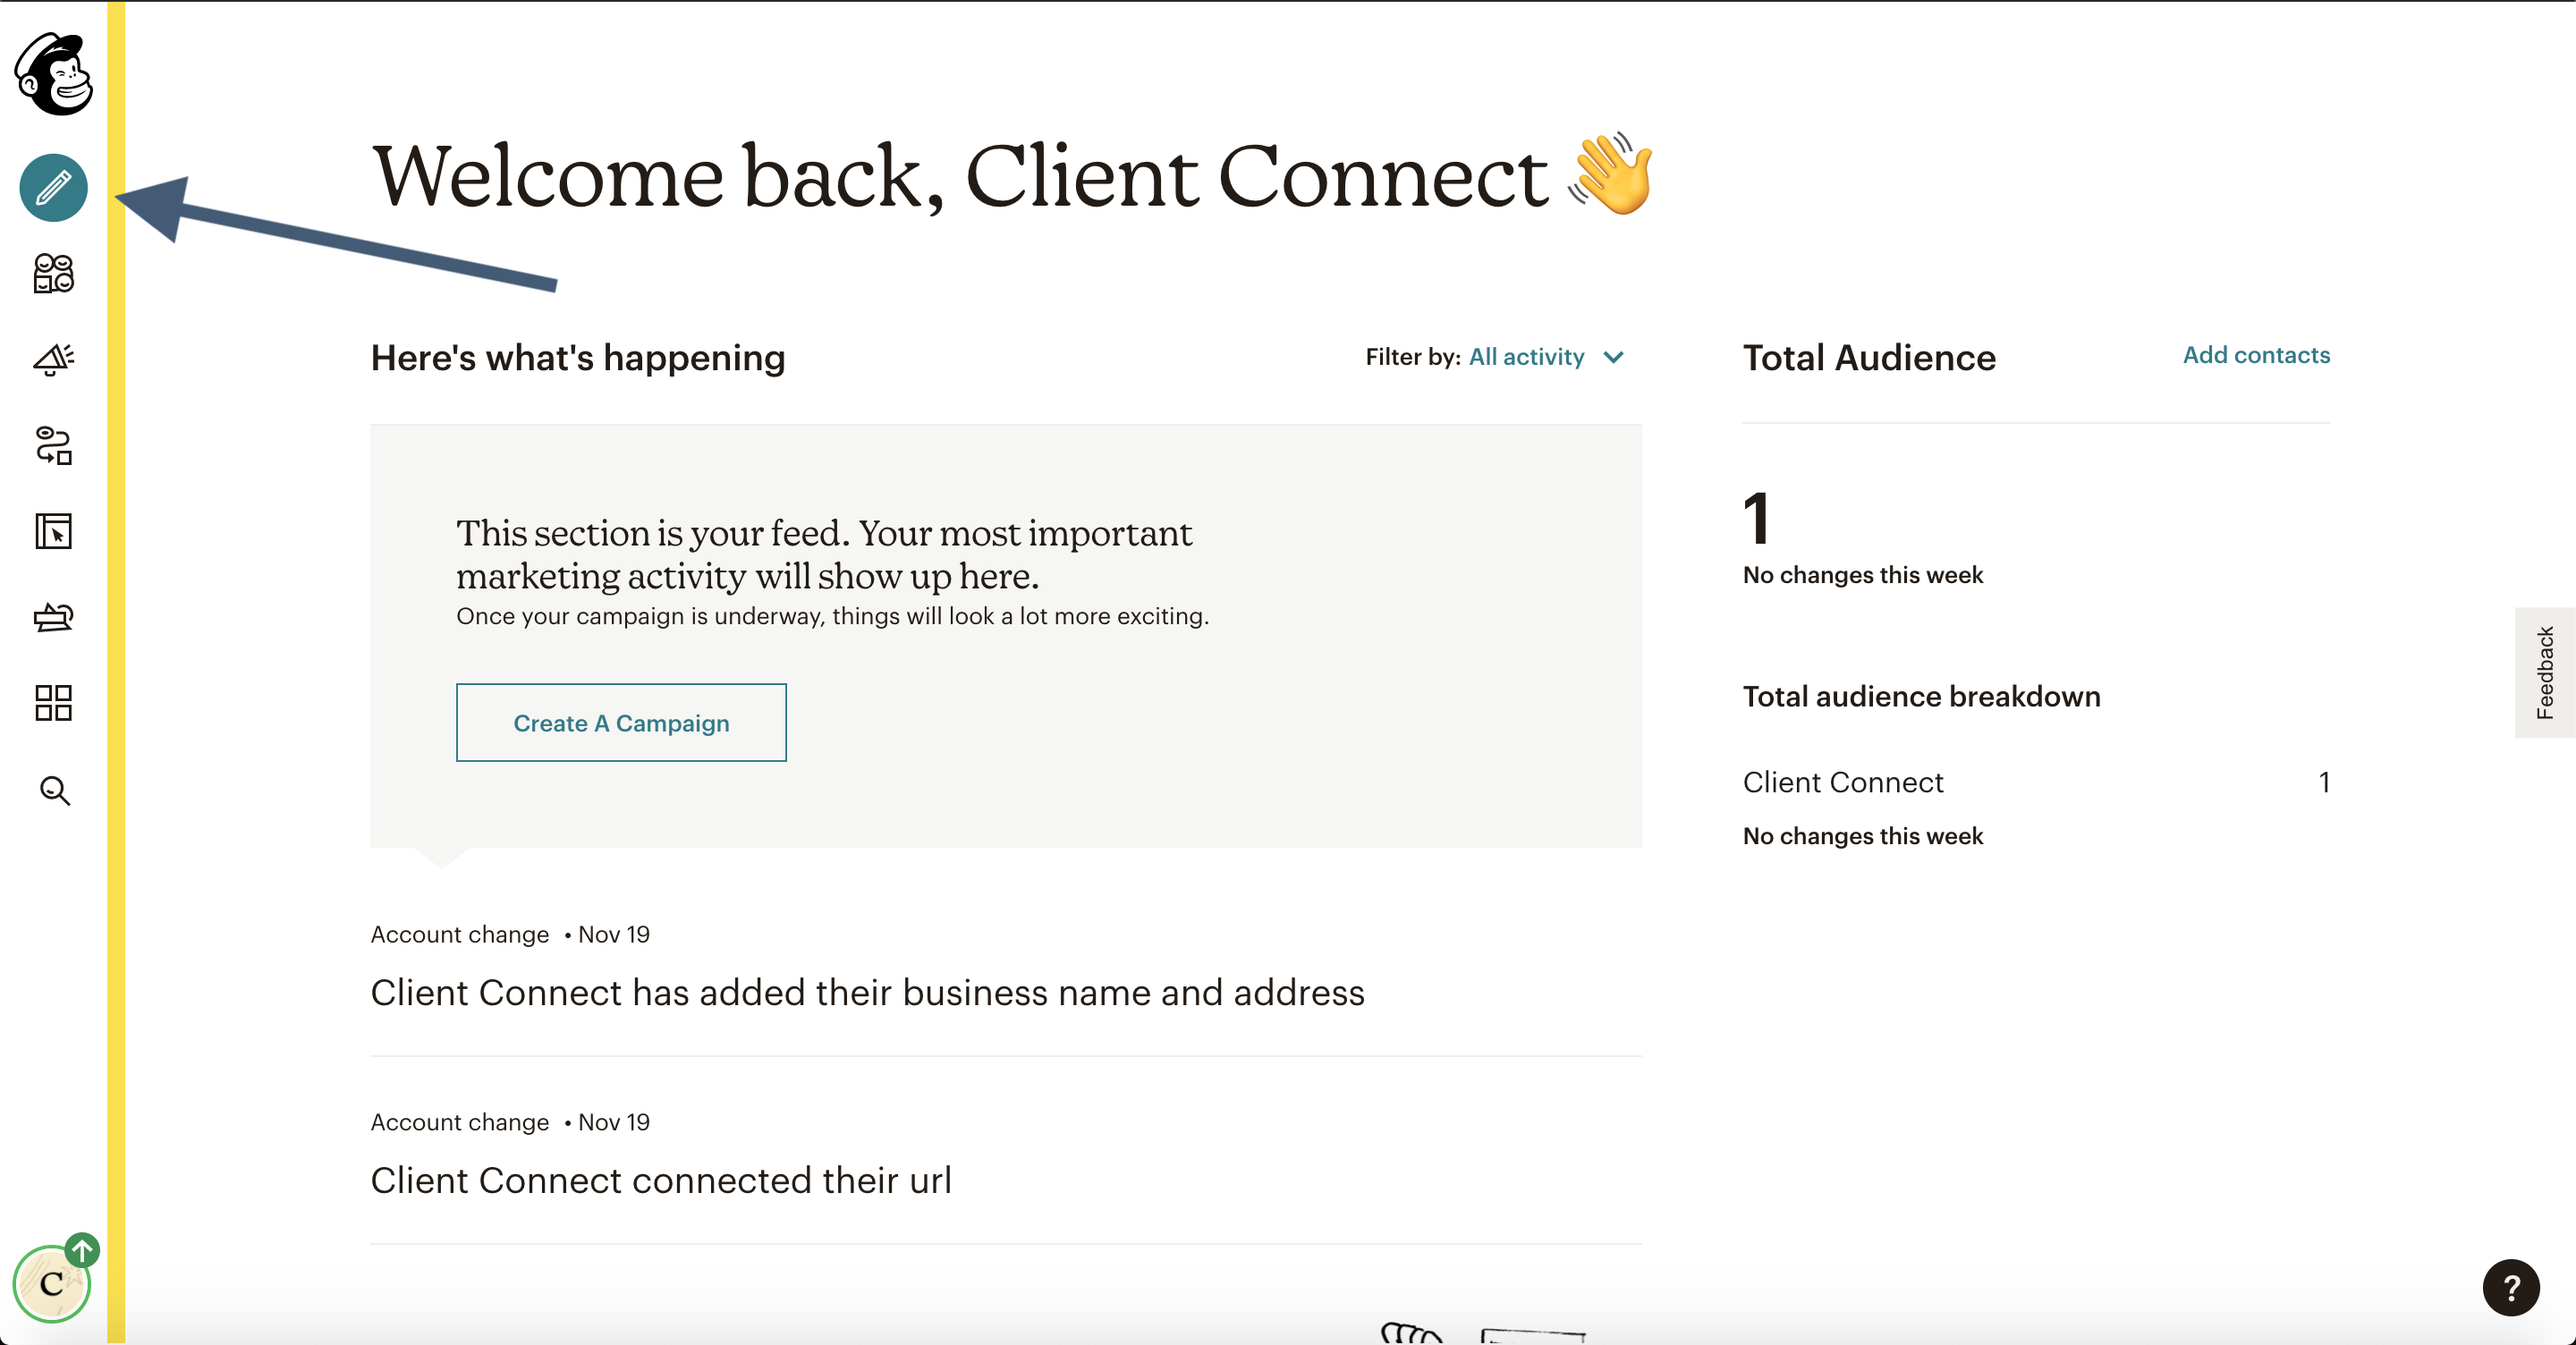
- To setup your automation, login to MailChimp and select the Create tab.
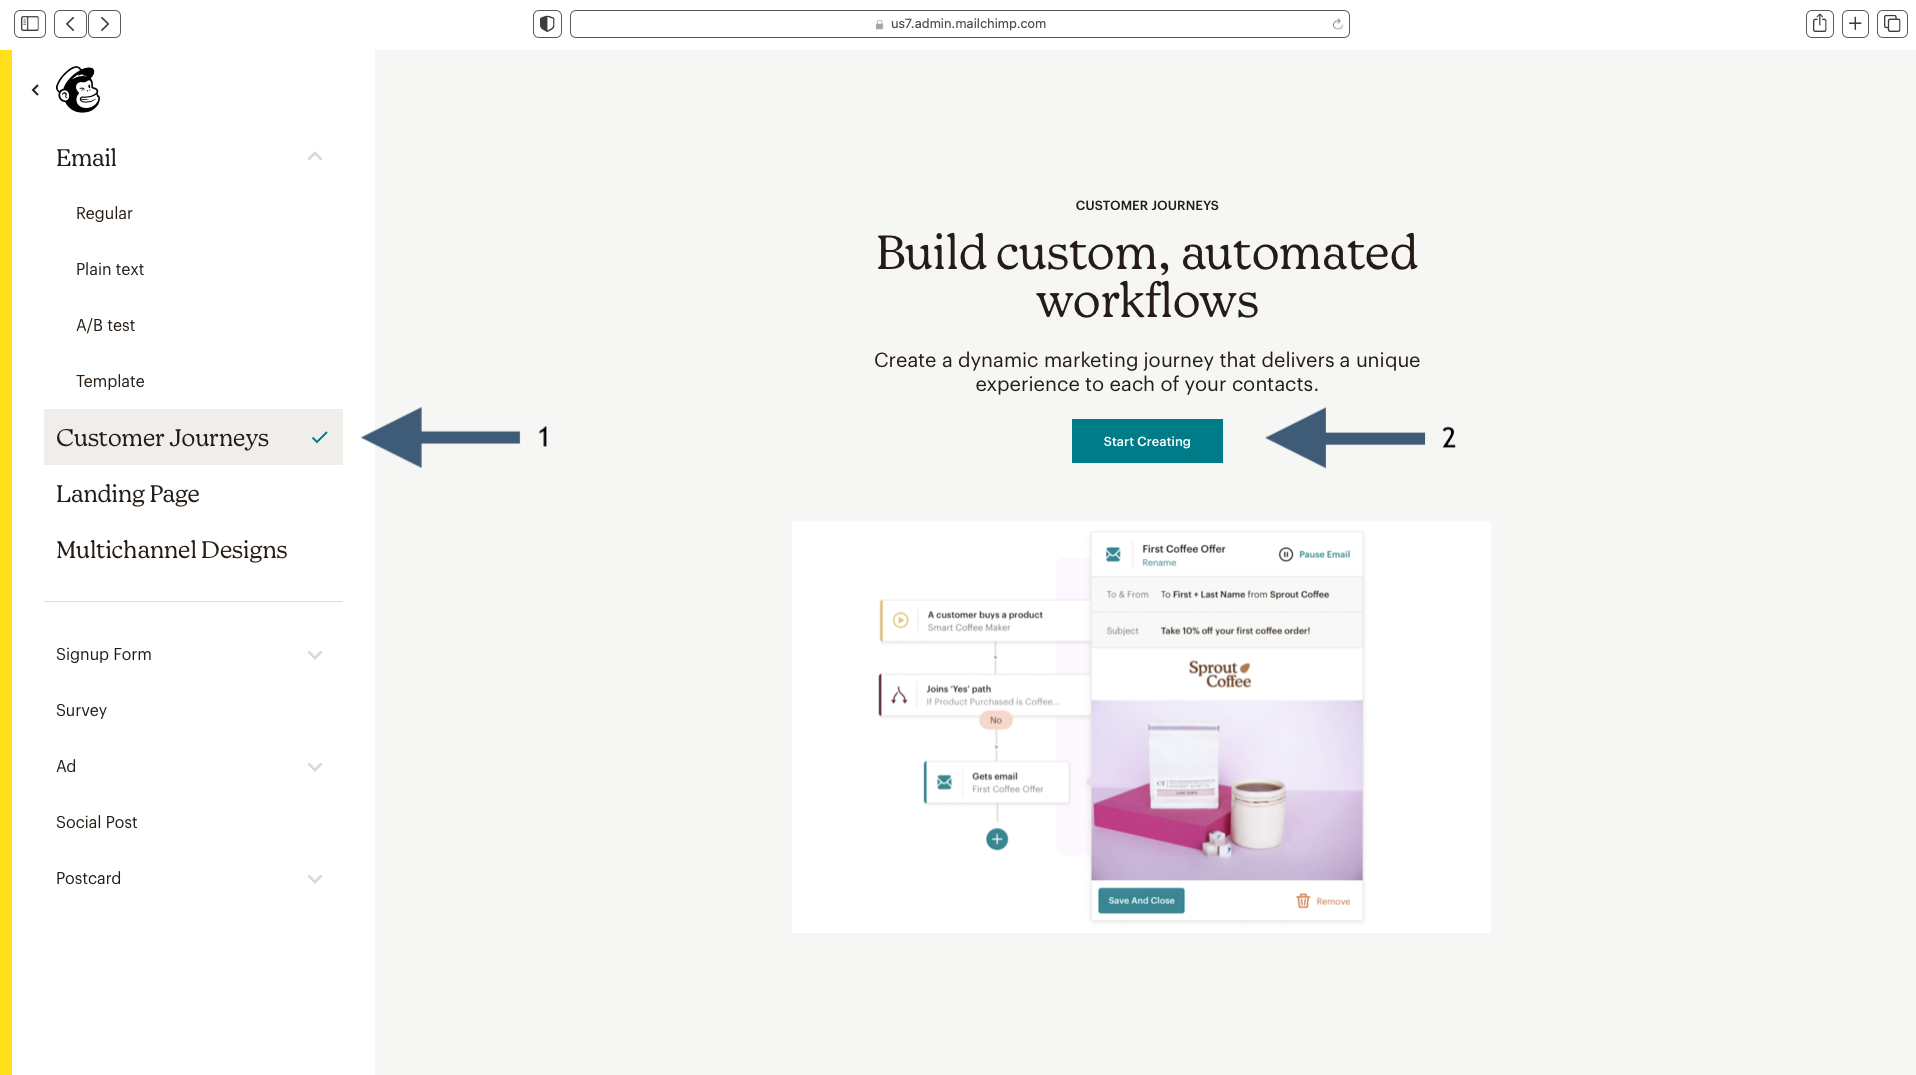
- Select Customer Journeys, then click on the Start Creating button
- Select Create, then choose Classic Automations.

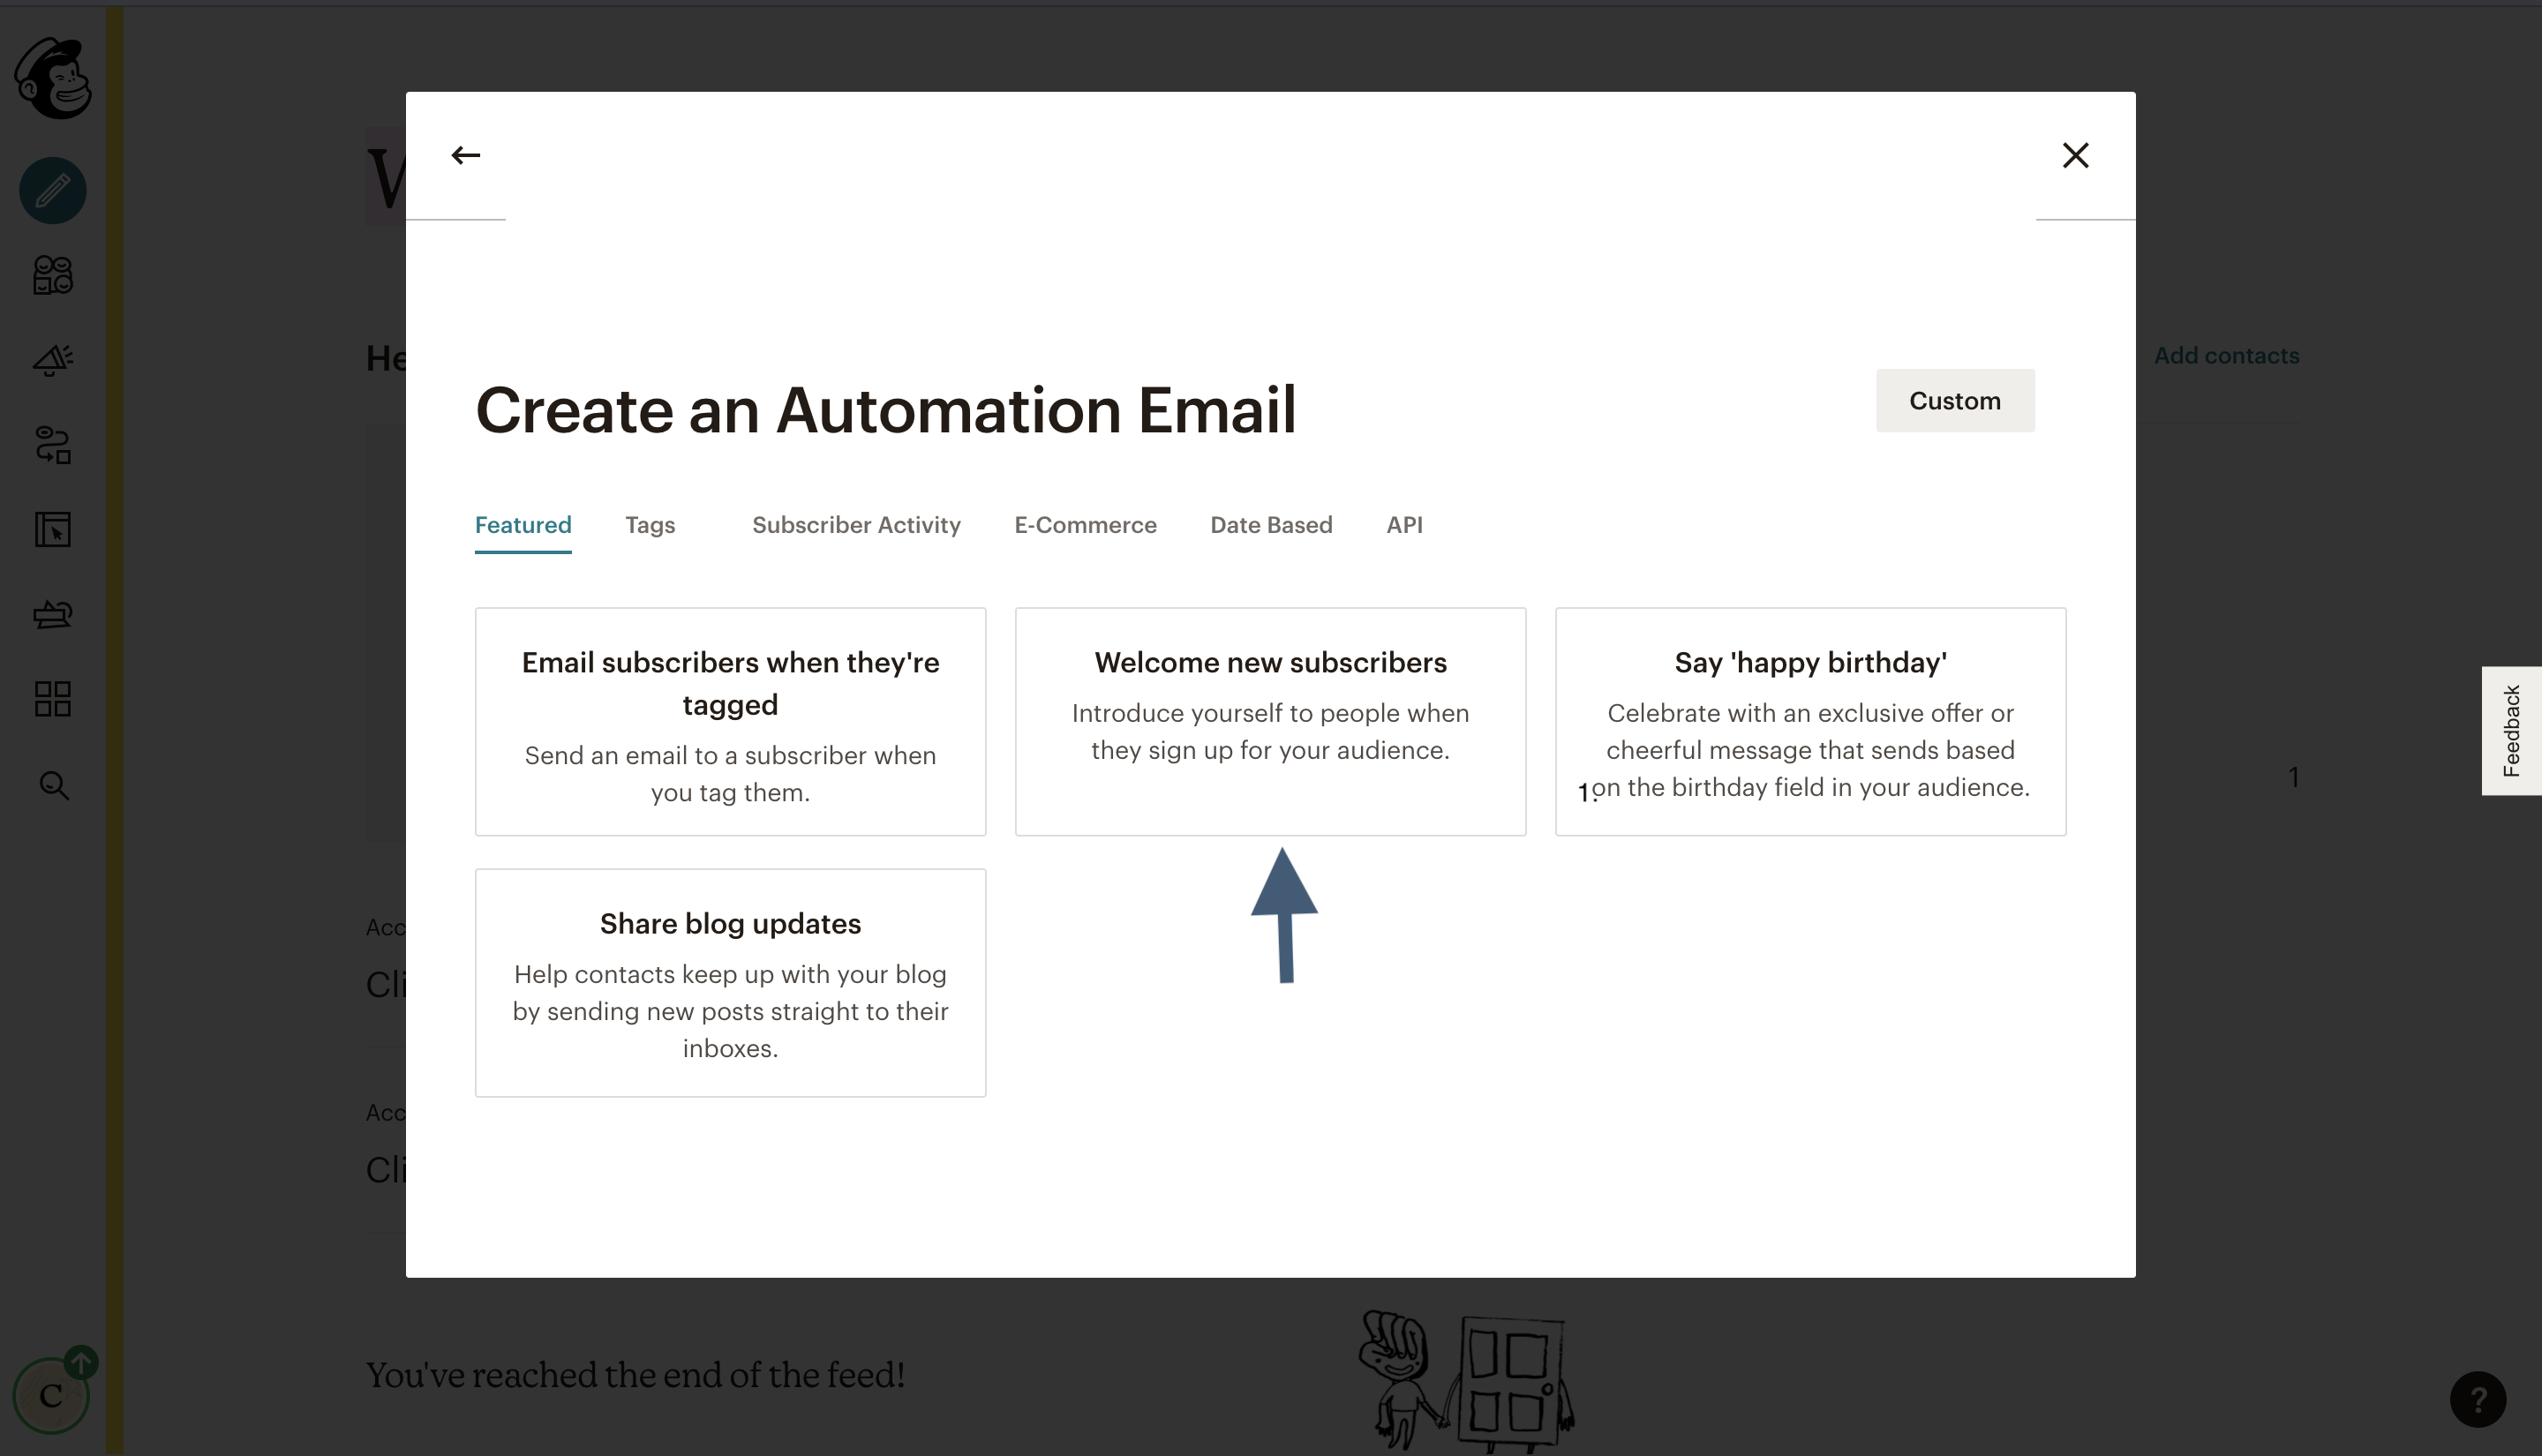
- Choose the Welcome new subscribers option.
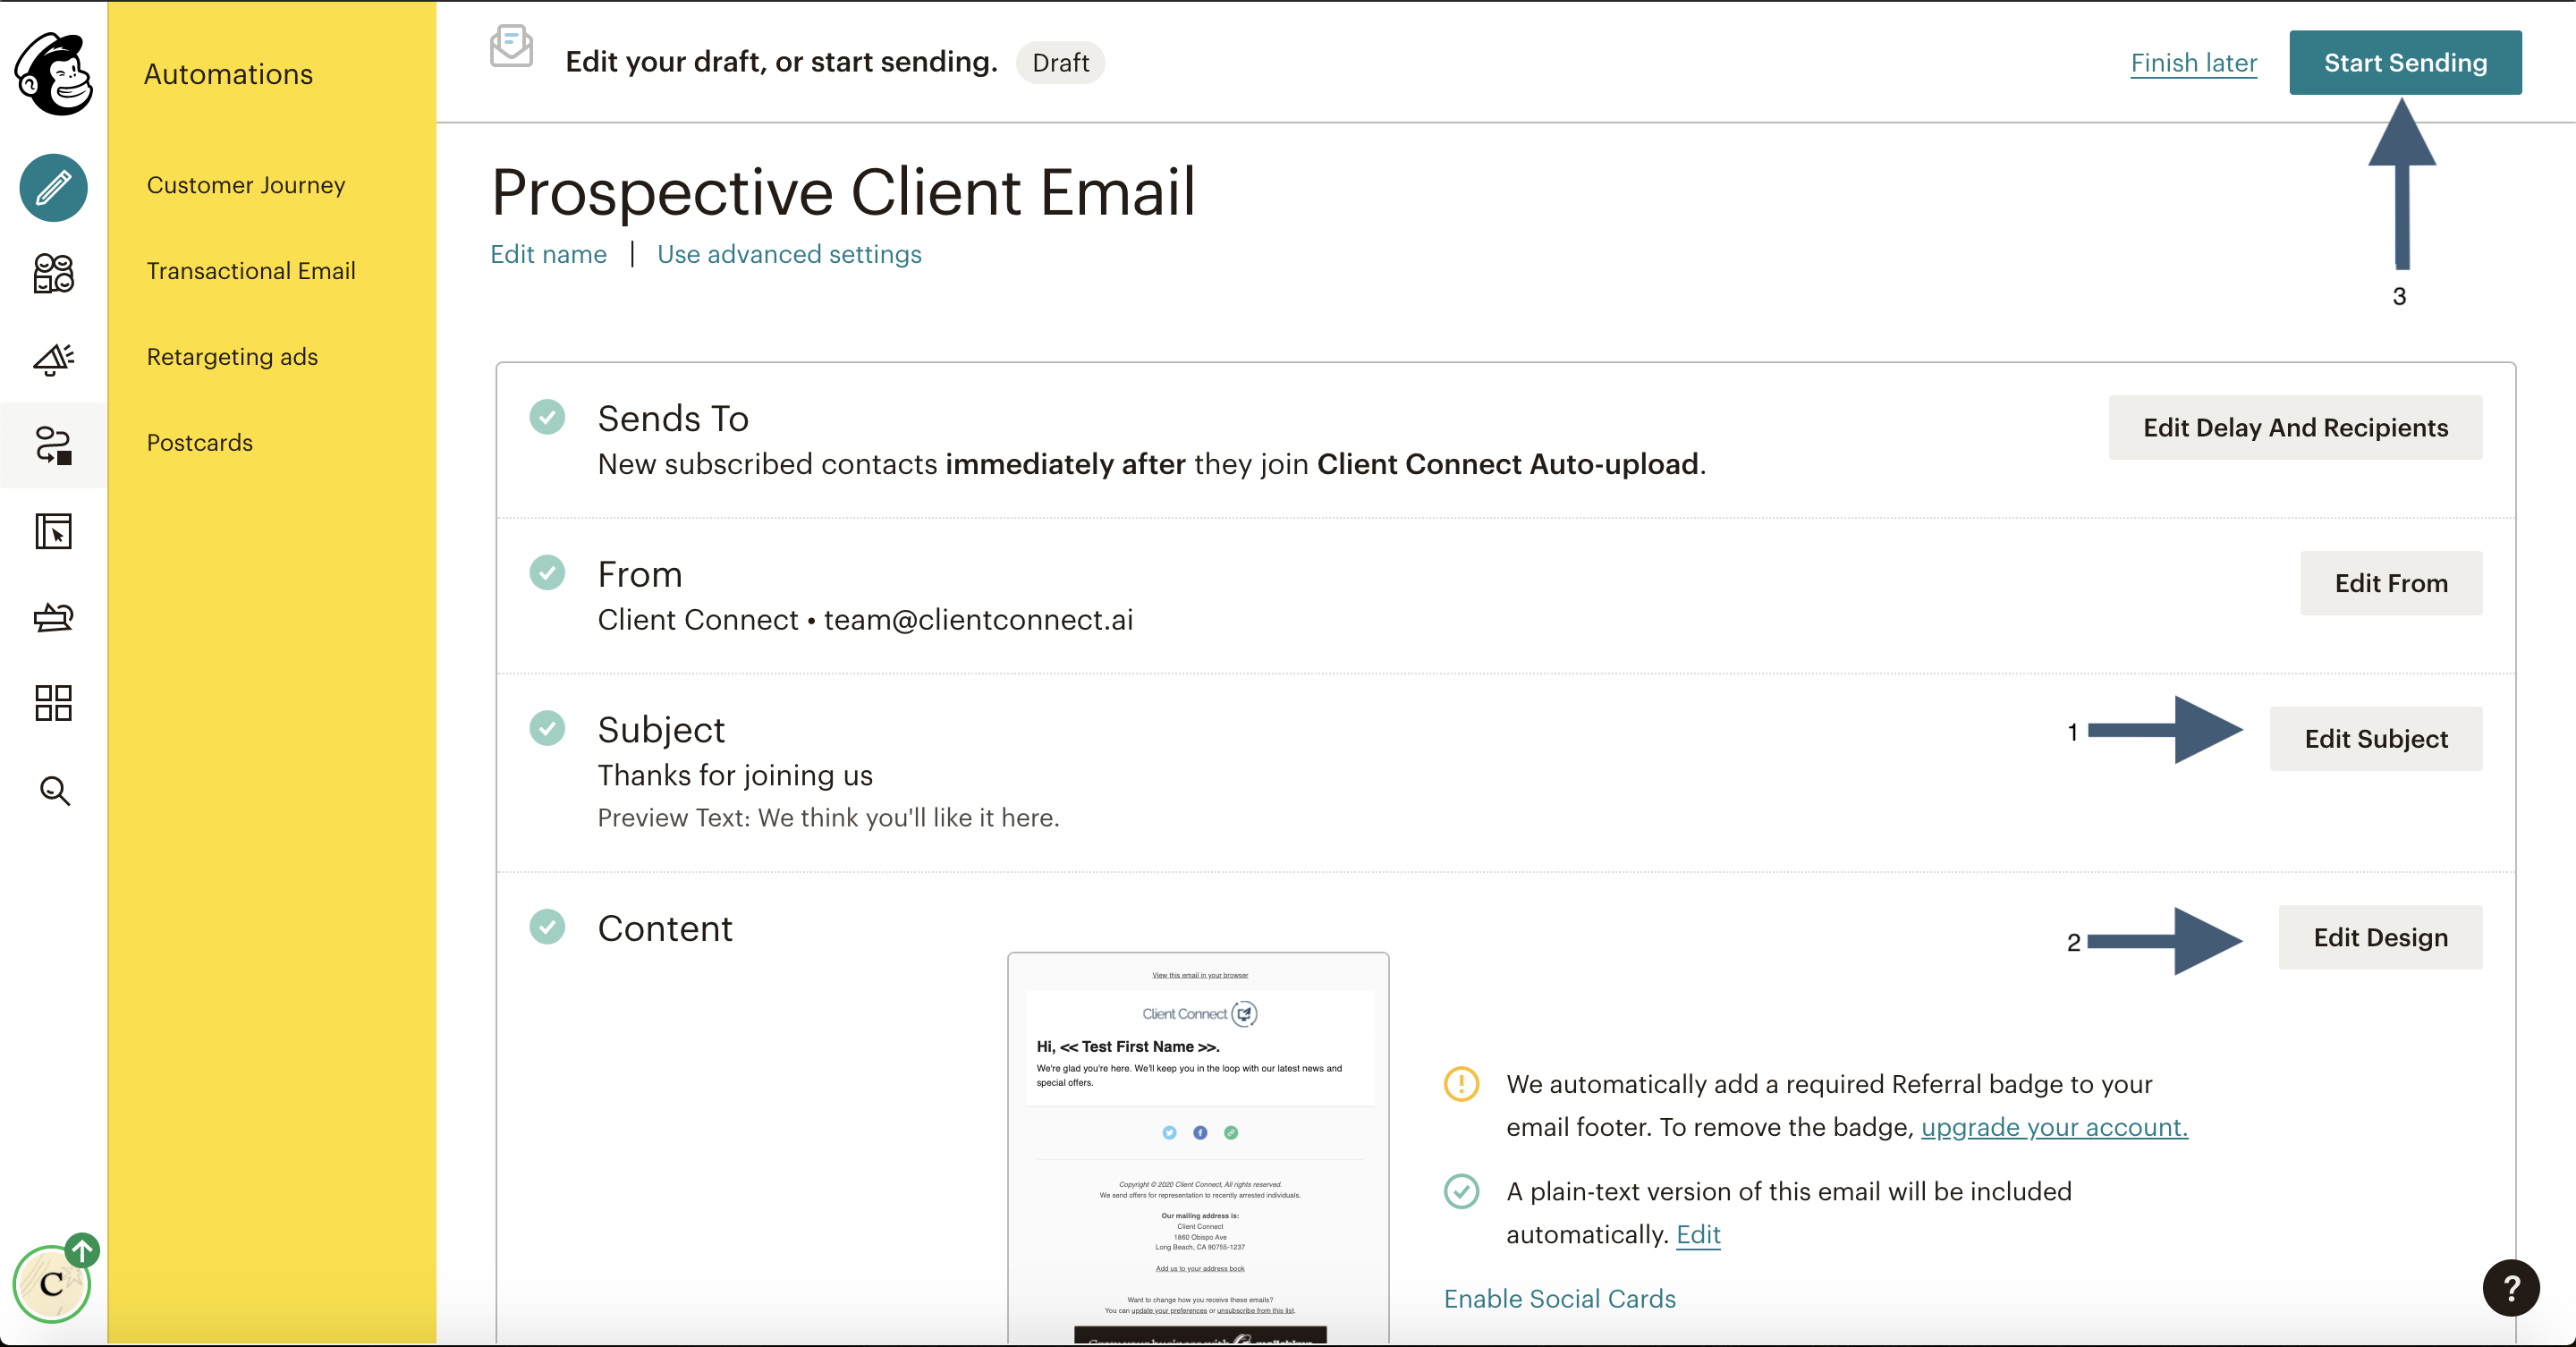
- Enter your campaign name, select the Client Connect Auto-Upload audience, then click Begin.

- Edit your email subject line, design your email, then hit send!
Congratulations! New criminal leads in your county will automatically receive the criminal defense marketing email you’ve designed. If you’d like to email arrestees retrospectively, you’ll need to utilize our dashboard’s download function to download previous arrestee data, then upload it into your “Client Connect Auto-Upload” audience on MailChimp.
Be sure to check out our other guides!
- How to Monitor your Email & SMS Campaigns.
- How to create emails that populate with recipients name and charge.
- How to dodge spam filters and reach arrestees.
- How to send yourself a test email in MailChimp®.
- How to create charge-specific campaigns.
- How to clean out your MailChimp audience.
Having trouble? Contact us and we’ll troubleshoot with you.